Contacts


Contacts |
|
|
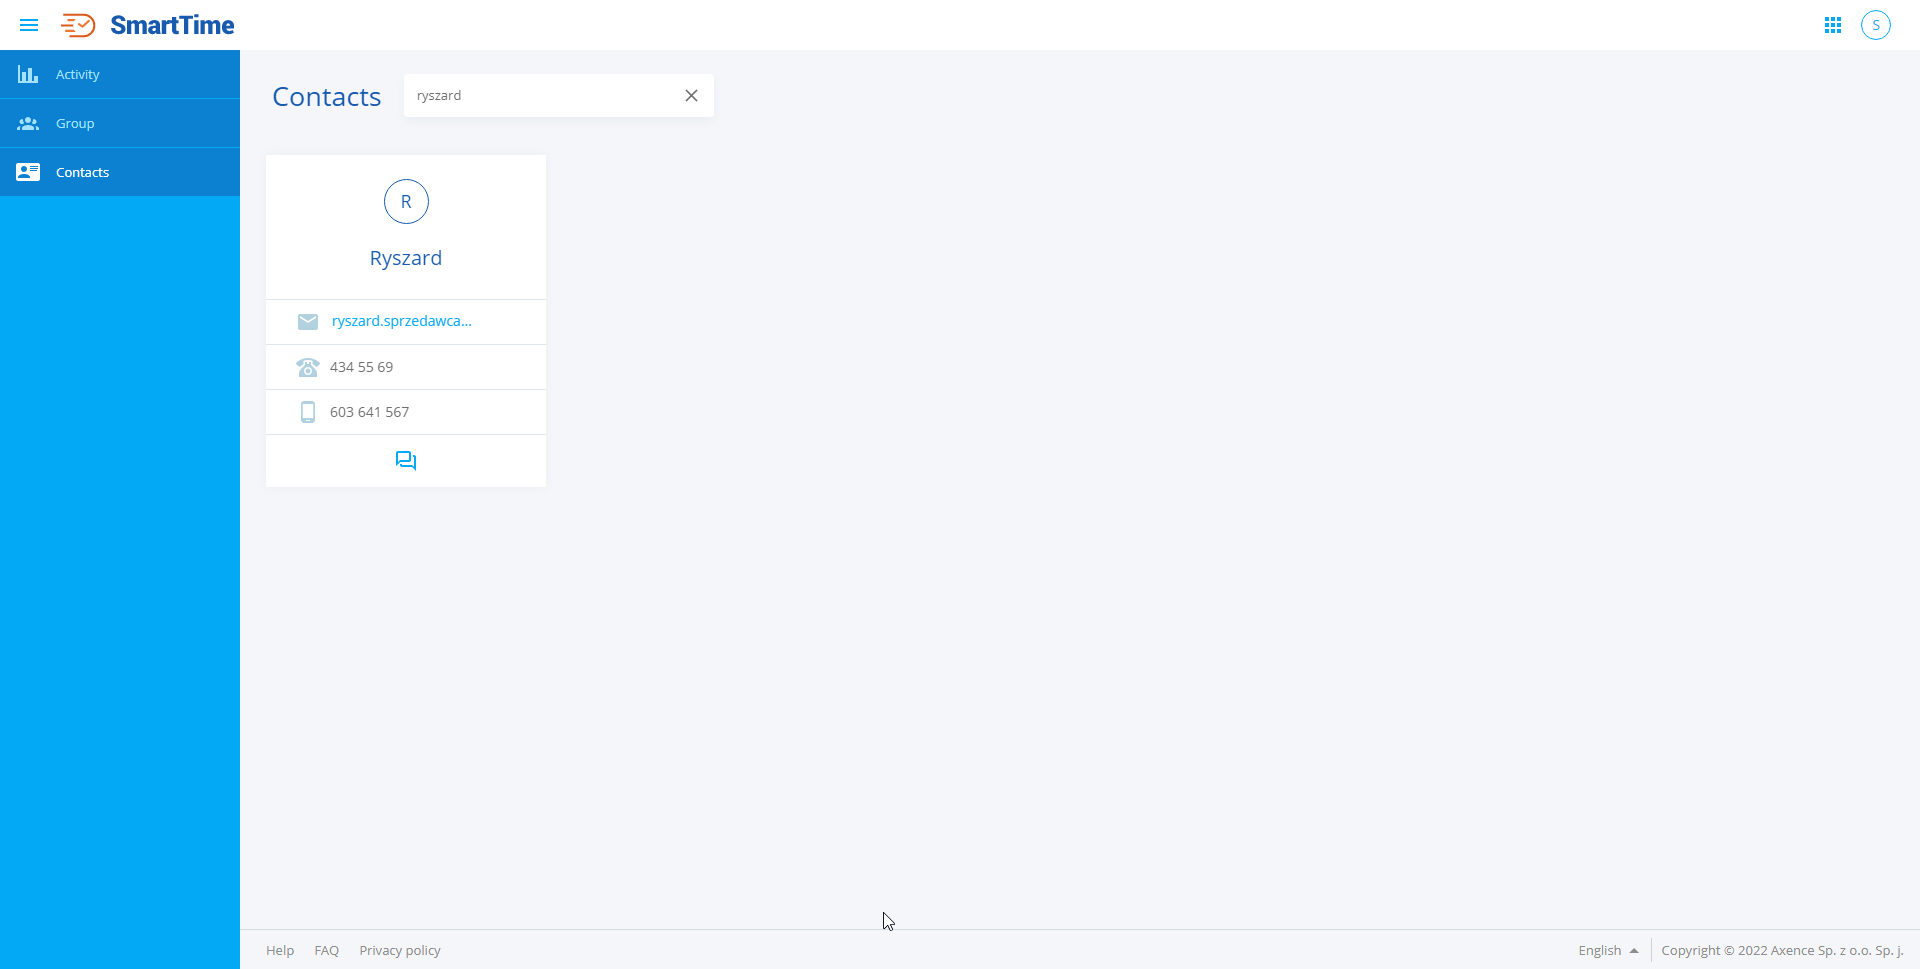
The Contacts tab enables the contact data of the users in the nVision database to be searched for and checked if necessary. The information displayed in this section are as follows: •First and last name of the user, •E-mail address, •Desk phone number, •Mobile phone number.
The search engine in the upper part of the window allows you to quickly find the user you are interested in. The user is searched for by three parameters: user name, first name and last name, and e-mail address.
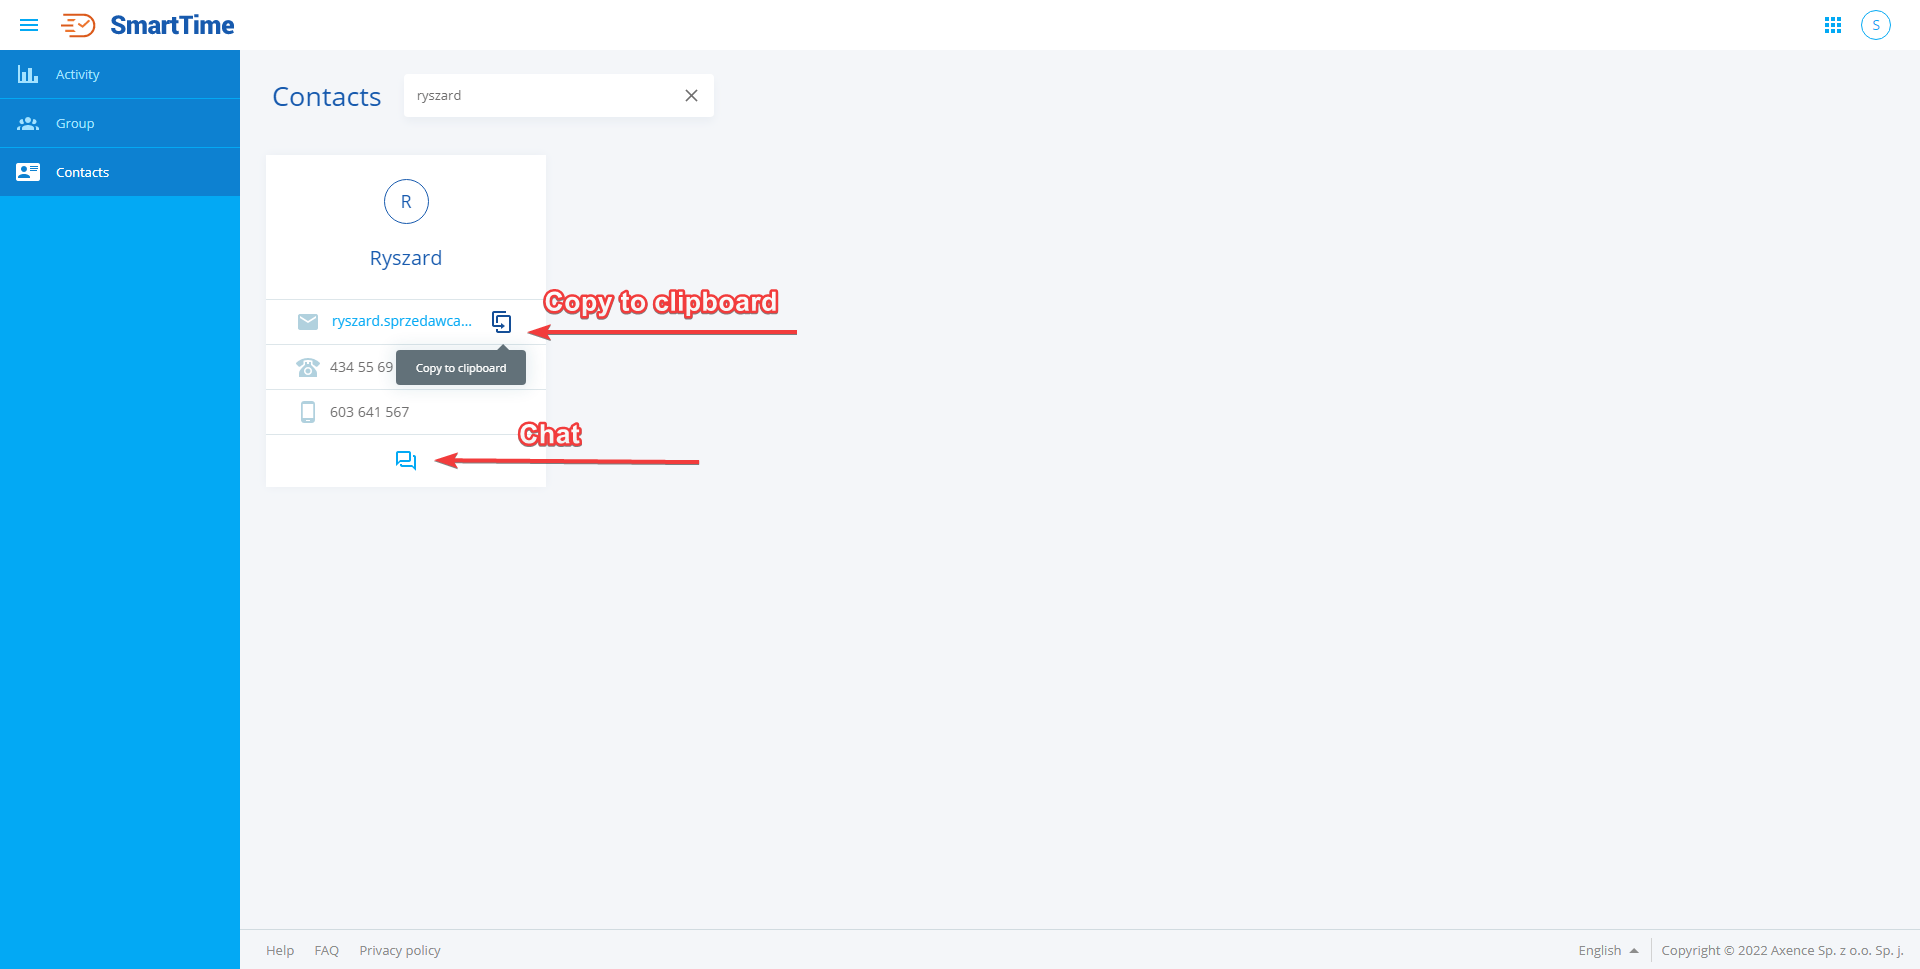
To quickly copy the e-mail address, desk phone number or mobile phone number of a given user, click on the copy to clipboard icon, which is displayed on the right, after hovering the cursor over the parameter of interest. From the Contacts tab you can also go to the chat with the selected user. To start a conversation with a user, click the icon at the bottom of the user information field. After clicking on the icon, the chat will open in a new browser window.
Note, if the chat access setting, both for the user currently logged in to SmartTime and the one we are looking for in the Contacts tab, is limited, the icon will not be available.
Restricting access to the Contacts tab
Axence nVision allows you to configure the user's access to the contact list. If the user has enabled access to contacts, it is displayed on the contact list and has access to it in the SmartTime module. If the user has disabled access to contacts, he does not appear in the contact list and he has no access to the contact list in the SmartTime module. This is a very useful feature as it allows you to hide technical accounts that would otherwise clutter your contact list.
From the console level, we can limit access to the contact list for both a single user and a group of users, or set a default configuration for new users.
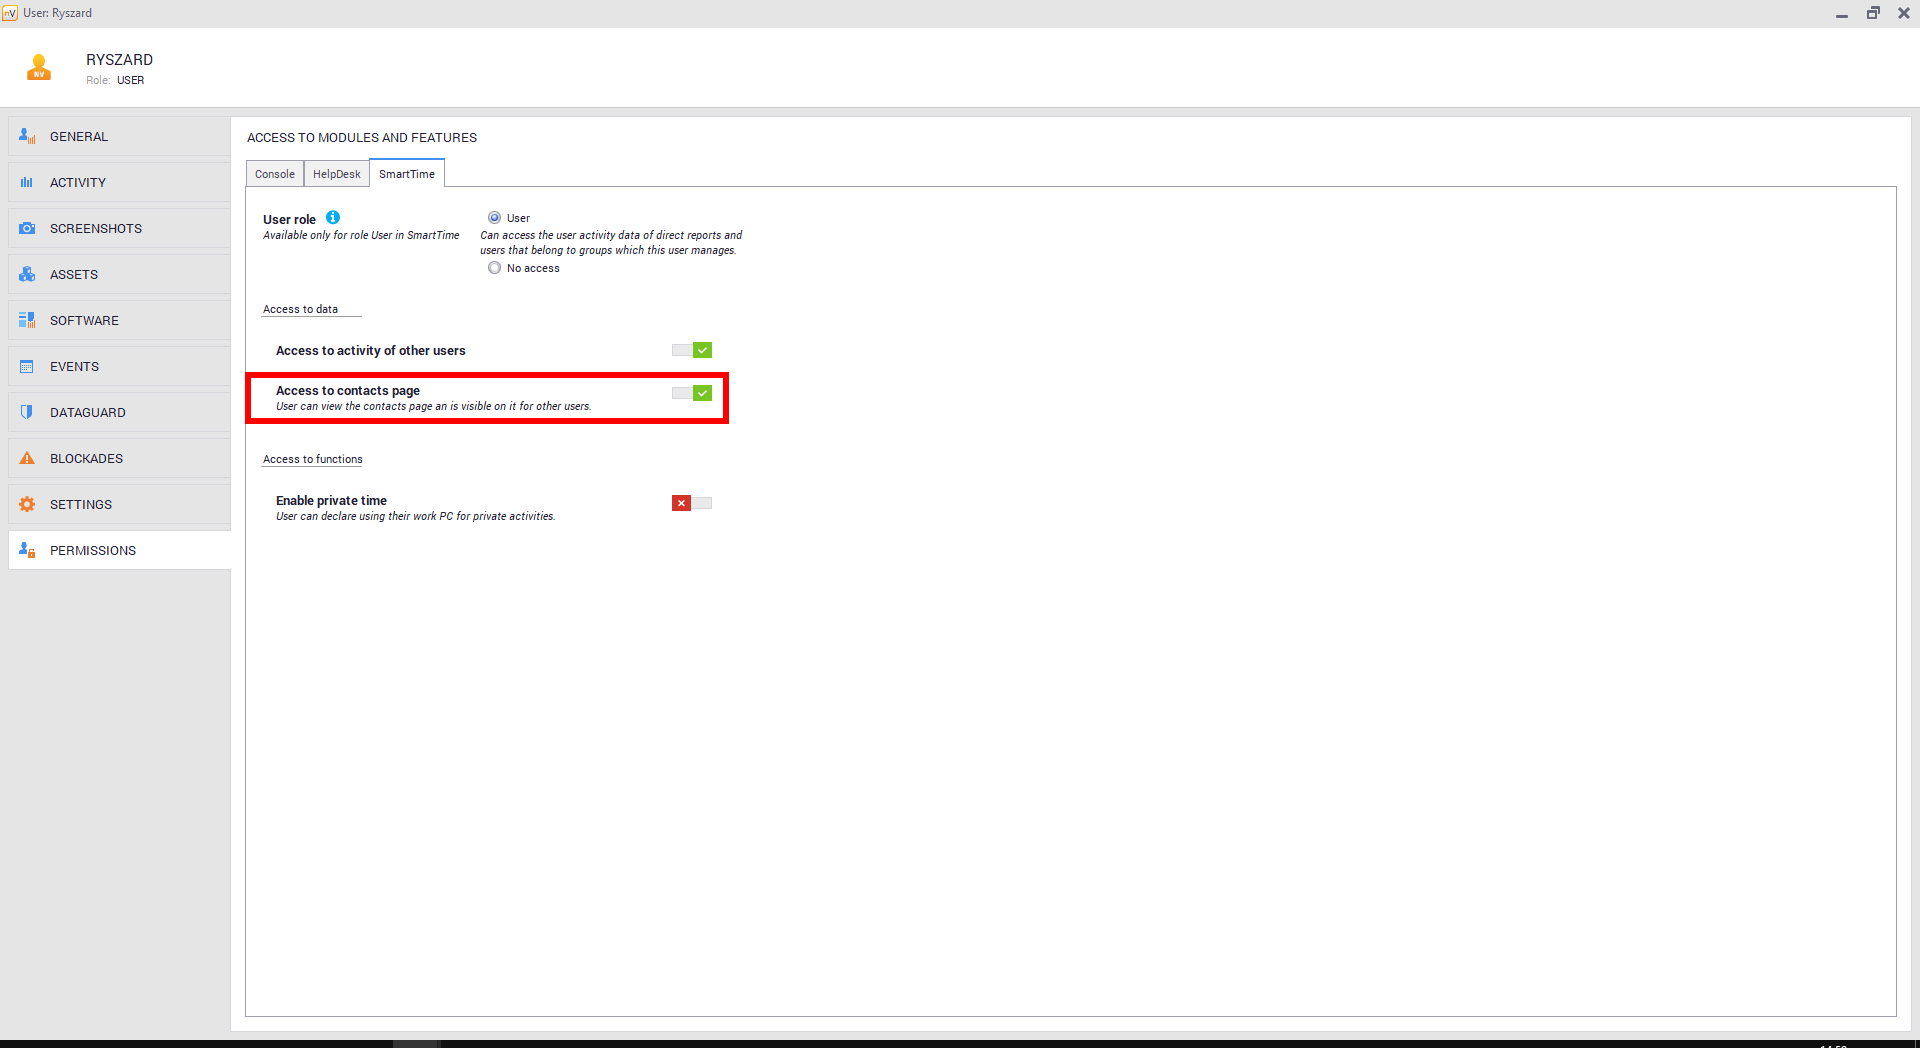
To configure access to the contact list for a single user: 1. Search for the appropriate user in the nVision console, and then open the user settings window. 2. Click on the Permissions tab. 3. Click on SmartTime. 4. By clicking on the slider, enable or disable access to the contact list. After clicking on the slider, the permissions of a given user will be updated.
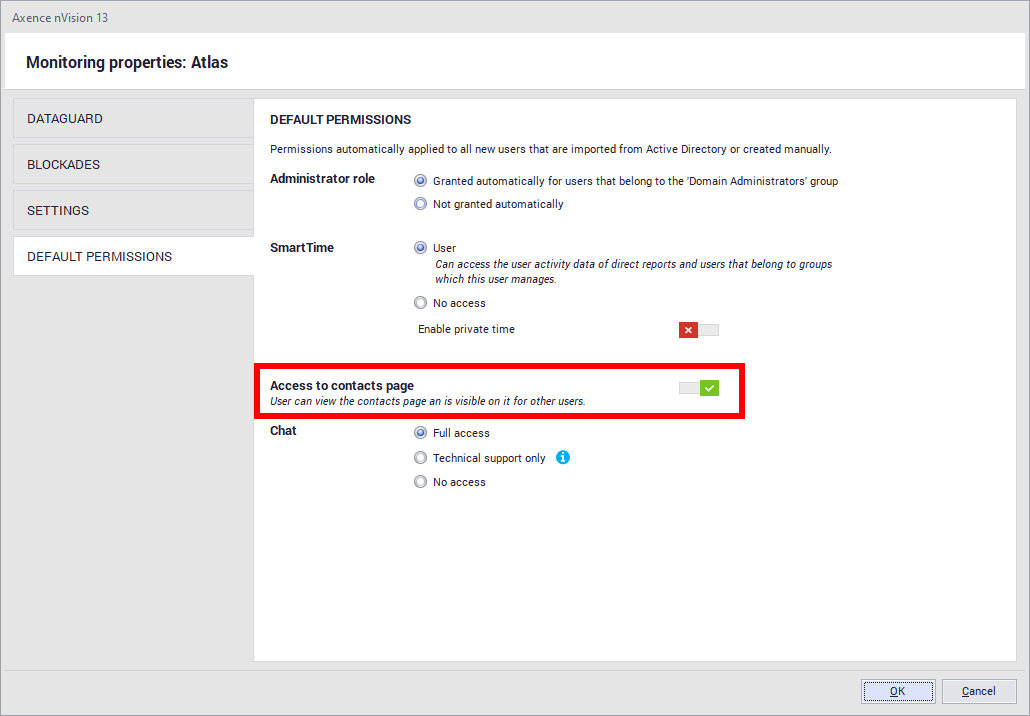
To configure global contact list access settings: 1. Enter the Atlas settings. 2. Right-click All Users and then select Atlas Information. 3. Click the Default Permissions tab. 4. By clicking on the slider, enable or disable access to the contact list. After clicking on the slider, the default settings for new users will be updated.
|